When done correctly, bath and shower combos are absolute workhorses. Kids can splash around at bath time, adults get a good shower in the morning, and you haven't sacrificed half your bathroom to achieve it.
The trick is understanding that you're designing for two completely different activities in one space. And that means being a bit clever about it. Here's how to design a shower and bath combo, step by step.
Steps to Designing a Bath & Shower Combo
Step 1: Measure Your Space
Before you fall in love with any particular bath or shower, you need to know exactly what you're working with.
Measure your bathroom carefully. You need at least 1500mm length and 700mm width for the bath itself, plus 900mm of clear space in front for safe access. That's roughly 2.4m x 1.6m total floor space as an absolute minimum.
Got less than that? You might need to rethink whether a bath-shower combo is the right call for your space. It's better to have a gorgeous shower than a cramped, awkward combo that nobody enjoys using.
Also measure ceiling height. You need enough room for a 1400mm minimum screen height, which means at least 2400mm ceiling height realistically. Lower ceilings can work but need more careful planning.
Don't forget to measure where your plumbing currently sits. Moving waste pipes is expensive and sometimes impossible depending on your floor structure. Work with what you've got where possible.
Step 2: Choose Your Bath Size and Style
Most standard Australian bathtub sizes are around 1500-1700mm long, 700-800mm wide, and 400-500mm deep.
A 1500mm bath is the bare minimum if you want to stretch out properly. Honestly? Go for 1600mm or 1700mm if you've got the space. That extra length is the difference between a cramped crouch and actually relaxing.

Width is less negotiable. Below 700mm and you'll be sitting sideways like you're in a canoe. Above 800mm doesn't add much unless you're going for one of those gorgeous freestanding numbers (which won't work for a shower combo anyway).
When you're browsing bathtub options, check the internal dimensions, not just the outside measurements. Some baths have chunky rims that eat into the usable space—which is annoying when you've carefully measured everything.
For tight spaces, consider P-shaped or L-shaped baths. These designs give you a wider showering area at one end while keeping the overall footprint manageable. They're specifically designed with bath-shower combos in mind.
Corner installations work beautifully in square bathrooms too. The bath tucks into a corner with screens on two sides, making a defined shower space. You'll need a corner bath specifically designed for this configuration though.
Material choice: Acrylic's lighter, warmer to touch, and easier to repair if it gets damaged, but it scratches more easily. Enamel-coated steel's heavier, more durable, and holds temperature better, but chips are harder to fix. For a bath-shower combo that's getting daily shower use, we lean toward acrylic for its warmth and resilience to everyday wear.
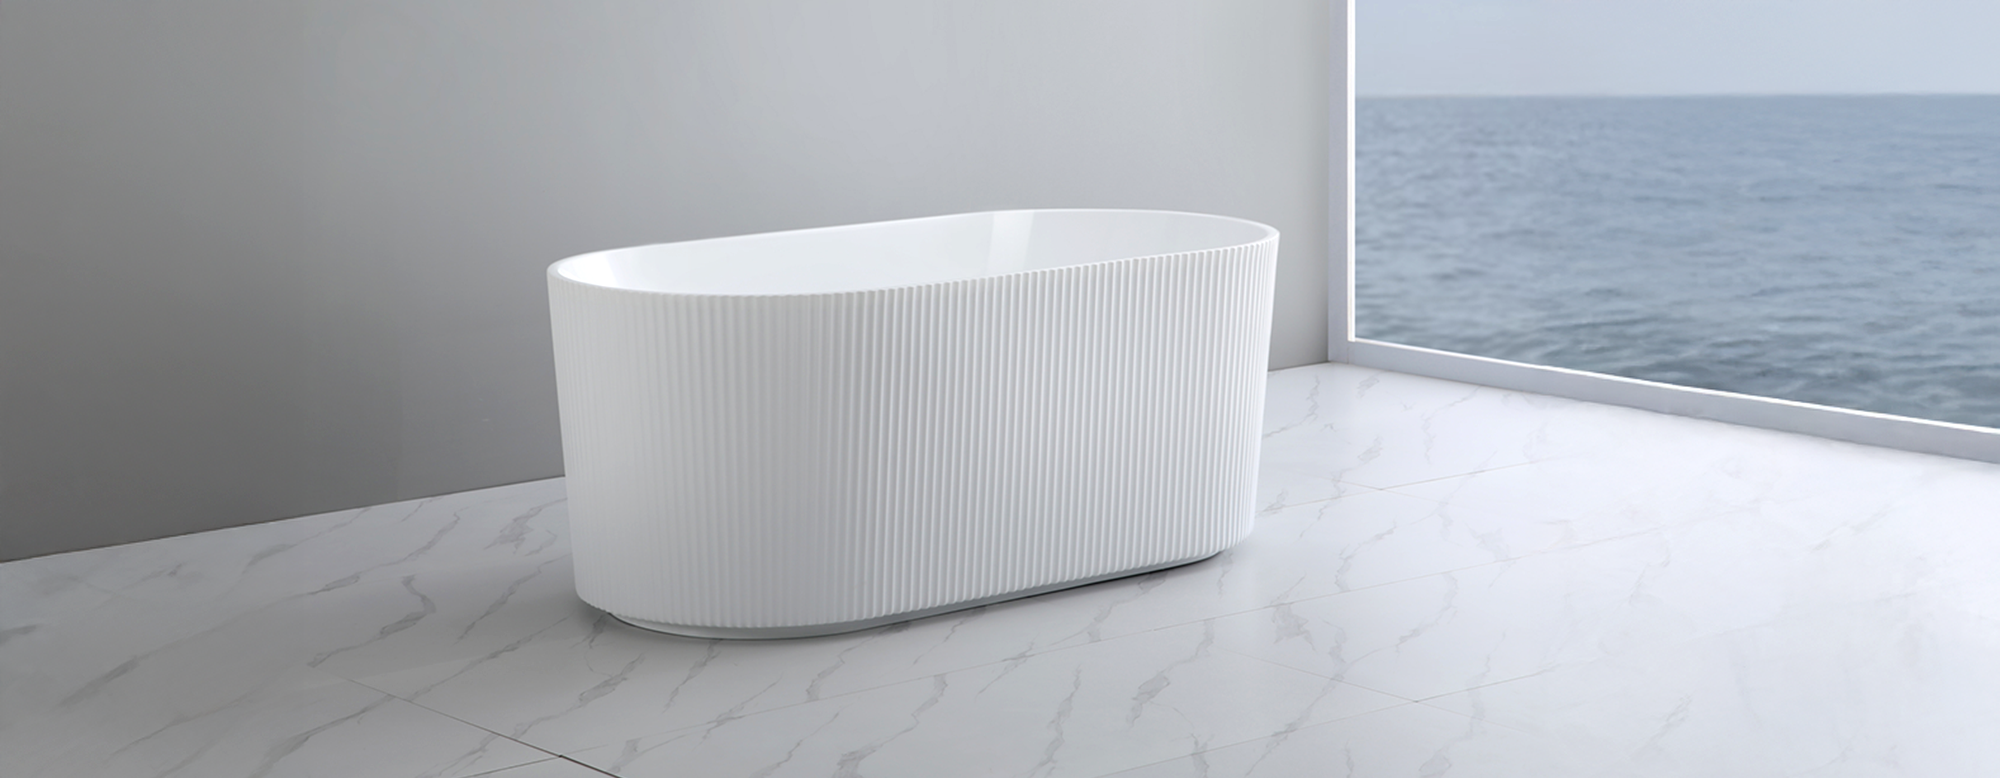
Bathtubs | Inset & Freestanding Bathtubs | Buy Premium Bathubs Online
Deep Bathtub Comfort That Supports You B..
Step 3: Plan Your Shower Screen Configuration
Right, here's where most people get it wrong. Your screen isn't just about privacy – it's also about keeping water off your floor.
You've got three basic options: fixed panels, pivot screens, and sliding doors. Each one shines in different situations.
Fixed panels are brilliant for tight spaces. One sheet of glass at the end of the bath does the job while keeping everything feeling open and airy. The catch? Limited coverage, so you need to think carefully about where your showerhead goes.
Pivot screens give you more coverage without taking over. They swing out when you want to hop in the bath, swing in when you're showering. Just make sure you choose decent shower hardware—cheap hinges will drive you mad with their squeaking and wobbling.
Sliding screens are the maximum coverage option. Two or three panels glide past each other to cover the whole bath length. They're heavier, trickier to install, but they're also the best at keeping water contained.
Whatever you pick, skip the fully-framed budget screens. Those chunky frames instantly date your bathroom. Go frameless or semi-frameless – it's worth the extra dollars.
Step 4: Get the Critical Heights Right
Here's the non-negotiable stuff. Get these measurements wrong and your combo won't work properly.
Screen height: Minimum 1400mm, preferably 1500mm. Your shower head sits around 2000-2100mm from the floor. Water doesn't politely fall straight down—it sprays sideways, bounces off tiles, creates mist. A 1200mm screen might look substantial, but trust us, it's basically decorative.
If you're putting in a fixed screen, consider going all the way to 1800mm. It'll look a bit like a wall, but you'll never deal with puddles on your bathroom floor again. Worth it.
Bath height: The top of your bath rim should sit 500-600mm from the floor. This is the sweet spot for safe entry and exit. Too low and it's hard to climb out of. Too high and it's dangerous to climb into.
Showerhead height: Standard is 2000mm, but if you've got tall family members, bump it up to 2100mm or install an adjustable shower rail instead. Everyone can set it to their own height and nobody's hunching.
Step 5: Position Your Showerhead Correctly
This is make-or-break territory. Get your showerhead position wrong and you'll be squashed against cold tiles or spraying water everywhere (or both).
Mount it about 250mm from the back wall. This puts the water stream over the middle of the bath where it belongs, and you can stand comfortably without doing that awkward pressed-against-the-wall dance.
Here's a pro tip: add a handheld shower head alongside your fixed one. Makes filling the bath easier, helps with cleaning, and if you've got mobility considerations, it's genuinely useful.
Think about the spray pattern too. You want water flowing toward the screen, not the open side of the bath. Position your showerhead so the natural spray direction works with your screen placement, not against it.
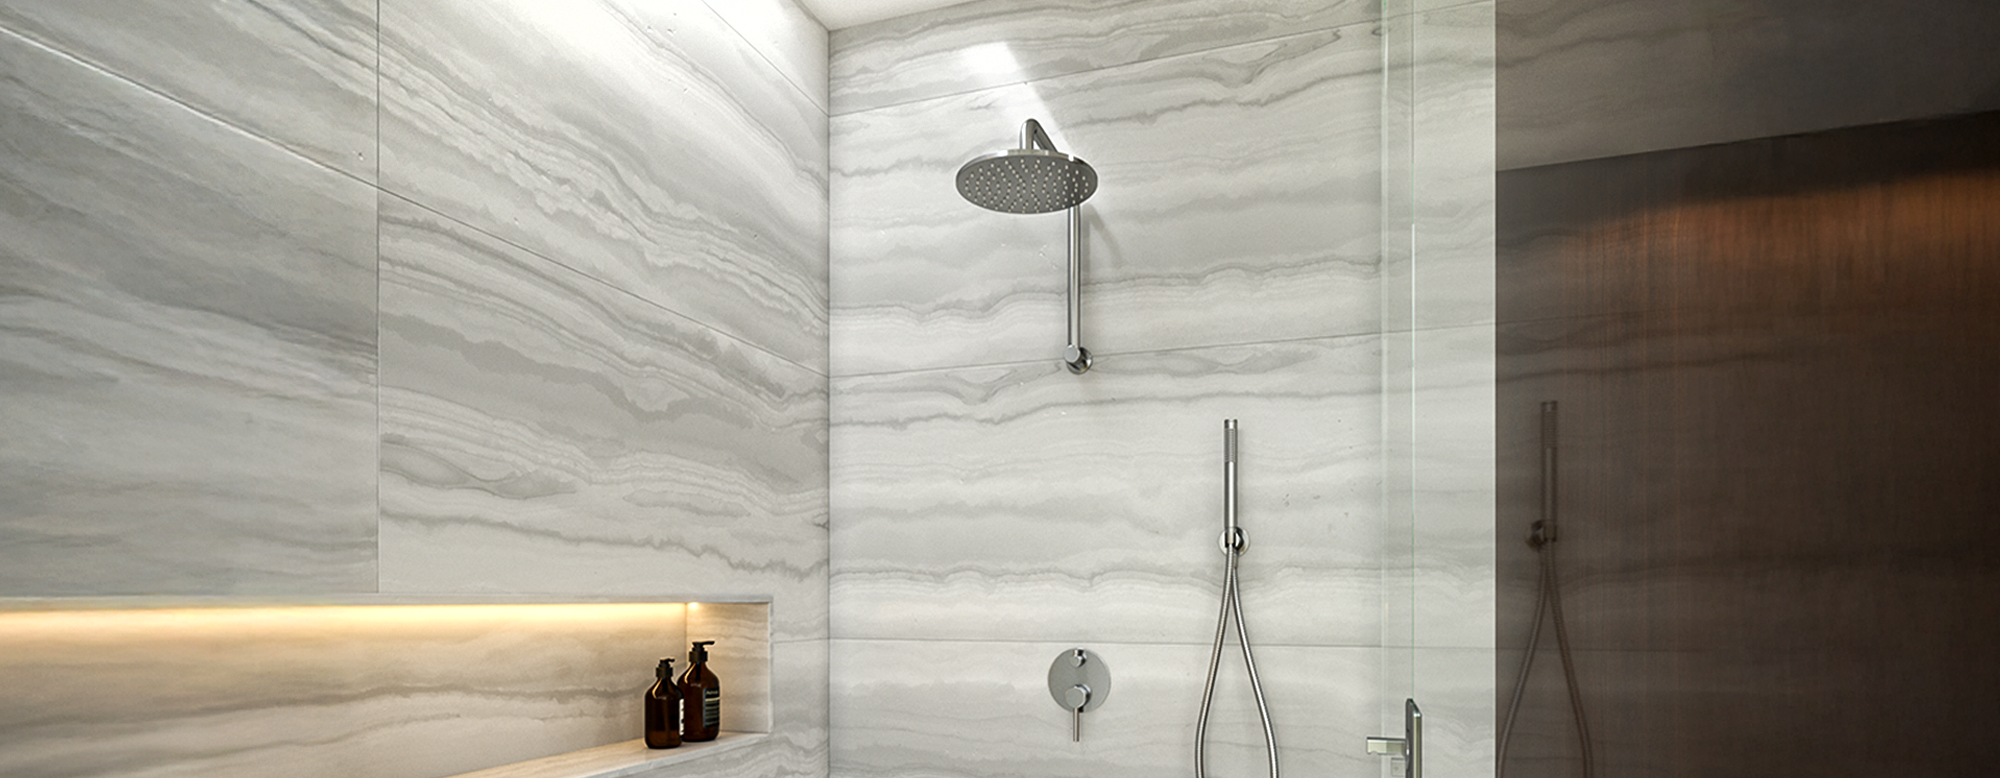
Shower Heads | Shower Arms | Handheld Showers | Rails | Buildmat
Upgrade To A Better Shower Experience A ..
Step 6: Plan Tap Placement and Configuration
Taps for bath-shower combos need some thought. You're controlling temperature for both a relaxing soak and a quick morning shower from the same set of fixtures.
Wall-mounted mixers are your best bet. They stay out of the way when you're showering, and you can reach them easily from outside the bath when you're running the water. Position them around 700mm from the floor—high enough to clear the bath rim, low enough to operate without stretching.
Our bath tapware collection includes heaps of mixers designed exactly for this dual-purpose situation. Look for ones with diverter valves that switch smoothly between bath spout and shower without requiring gymnastic reaching.
Bath spouts need to stick out far enough to fill the bath properly, but not so far you're whacking your head on them when you're showering. Around 150-200mm from the wall hits the sweet spot.
Consider where you'll stand when operating the controls. You should be able to turn on the water and adjust temperature from outside the bath before you step in. Nobody wants to climb into a bath to turn on a freezing shower.
Step 7: Plan Your Tile Layout and Waterproofing
Australian building codes classify bath-shower combos as wet areas, which means specific waterproofing and ventilation rules apply. Skip these and you're asking for expensive problems down the track.
Your entire bath surround needs proper waterproofing membrane behind the bathroom tiles. The membrane has to go at least 1800mm up the walls in the shower area and extend 150mm past the bath edges.
For the tiles themselves, choose tiles of at least 300x600mm for bath surrounds. Anything smaller creates a maze of grout lines that become a nightmare to keep clean. Save tiny mosaic tiles for feature strips, not entire walls.

Run tiles vertically rather than horizontally where you can. Visually heightens the space and looks cleaner. Your tiler might charge a bit more for this orientation, but it's worth it.
Think about tile placement around your shower screens and tap fixtures before you start. Plan these intersections properly so you don't end up with weird slivers or cuts that mess up the pattern.
Step 8: Sort Out Storage and Accessories
Bath-shower combos need storage for shampoo, conditioner, body wash, bath toys, razors—the list goes on. But bulky caddies and shelves make an already cosy space feel cramped.
Built-in niches are the dream. Recessed shelves in the shower wall hold everything without sticking out into your elbow room. Standard size is 300mm wide by 900mm high, which fits most bottles and tubes. Plan these during your waterproofing stage—retrofitting them later is difficult.
If niches aren't on the cards, quality shower shelves in brushed metal or glass mount straight to walls. Corner-mounted options maximize usable surface without eating into your space.
Skip the suction-cup caddies that dangle from showerheads. They always fall off eventually, sending products crashing down. Plus they look temporary. Do it properly from the start.

Don't forget about towel storage either. You need somewhere to hang towels within easy reach of the bath exit. Wall-mounted towel rails work better than bulky towel racks in compact bathrooms.
Step 9: Check Ventilation Requirements
Bath-shower combos create heaps of moisture. You need either a window that opens or an exhaust fan rated for bathrooms. We see too many bathrooms with inadequate ventilation developing mould within months. Don't be that person.
If you're retrofitting a combo into an existing bathroom, check your current ventilation before you start. Upgrading these systems costs money, sure, but fixing water damage costs a whole lot more.
The exhaust fan should be positioned over the shower end of the bath where most steam generates. It needs to vent outside, not into your roof cavity. And it should run for at least 10-15 minutes after showering to properly extract moisture.
→ Check out our bathroom heating and ventilation options.
Common Shower and Bath Combo Mistakes to Avoid
- Installing the shower screen as an afterthought is the biggest blunder we see. People tile everything, then realize they haven't thought about screen fixings or water containment. Plan your screen before you tile.
- Choosing taps purely for looks without thinking about function is another classic error. That gorgeous vintage-style mixer might photograph beautifully but be impossibly awkward to use from outside the bath. Think about the ergonomics.
- Cheap screens are false economy. They leak, develop problems quickly, and make your whole bathroom look budget. The screen's a focal point—invest properly.
- Ignoring the fall in your bath base causes water pooling. The bath floor should slope gently toward the drain. Perfectly flat looks neat but doesn't drain properly.
When a Bath-Shower Combo Isn't the Answer
Sometimes it's just not the right solution, even when it seems obvious for space-saving.
If nobody in your household actually takes baths, you're better off with a dedicated shower. More space, better functionality, lower maintenance. Walk-in showers are more accessible and practical for loads of households.
Tiny bathrooms where even a compact combo feels cramped might be better suited to a shower-only setup. Consider whether you genuinely need bathing facilities in that particular room.
Investment properties, however, are different. Tenants expect baths, especially in family homes. The resale or rental value often justifies installation even if it's not your personal preference.
Design Your Perfect Bath-Shower Combo with Buildmat
Getting the dimensions, heights, and configuration right transforms a bath-shower combo from "making do" into genuinely functional space.
Our bathroom renovation range includes everything from bathtubs and shower tapware to bathroom accessories that complete the space. Each product listing includes detailed dimensions so you can plan accurately.
We've helped thousands of homeowners design bath-shower combos that work for their specific spaces and needs. The difference between a well-designed combo and a poorly executed one is huge – and it comes down to following these practical rules rather than just winging it.
Need help fitting out your shower/bath combo?
You can speak with our team or visit the Buildmat showroom if you want personalised guidance. We're here to make the process easier.
Phone: 1300 123 122
Email: sales@buildmat.com.au
Showroom: 46 Brindley St, Dandenong South VIC 3175 Australia
FAQs
What's the minimum space needed for a bath-shower combo?
You need at least 1500mm length and 700mm width for the bath itself, plus 900mm clear space in front for safe access. That's roughly 2.4m x 1.6m total floor space minimum. Anything smaller becomes genuinely tricky to use safely and comfortably. We don't recommend going smaller unless you absolutely have no choice.
Can I install a bath-shower combo myself?
Not unless you're a qualified plumber and understand Australian waterproofing codes inside-out. DIY bath installations frequently fail waterproofing requirements and create expensive problems. The plumbing connections, waterproofing membrane, and proper falls all need professional expertise. Get quotes from licensed professionals—it's worth it for peace of mind.
How do I stop water leaking around the screen?
Check three things: screen height (should be 1400mm minimum), proper sealing where the screen meets the bath, and where your showerhead's positioned. Most leaks come from spray escaping over or around inadequate screens. If your screen's properly sized and sealed but still leaking, your showerhead's probably pointing the wrong way.
Should I choose acrylic or enamel for the bath?
Acrylic's lighter, warmer to touch, and easier to repair if it gets damaged, but it scratches more easily. Enamel-coated steel's heavier, more durable, and holds temperature better, but chips are harder to fix. For a bath-shower combo that's getting daily shower use, we lean toward acrylic for its warmth and resilience to everyday wear.
What about curved screens versus straight?
Curved screens give you slightly more elbow room while showering, which is genuinely useful when space is already tight. The downside? They're pricier and trickier to keep clean. Straight screens are cheaper, easier to maintain, and work perfectly well. Go curved if budget allows and space is really cramped.
How often should I replace the shower screen?
Quality screens last 15-20 years with decent maintenance. You'll probably need to replace seals and maybe hinges long before replacing the screen itself. If the glass develops permanent clouding from hard water, or if the frame corrodes, replacement makes sense. Otherwise, good cleaning and maintenance keeps screens going indefinitely.
Do I need a bath waste overflow?
Yep, it's a safety requirement. Overflows stop your bath flooding if someone forgets they're filling it (we've all been there). They also provide backup drainage if the main waste blocks. Every bathtub should have an overflow—it's standard on all quality products and required by Australian standards anyway.
What's the best shower head type for a combo?
A combination of fixed overhead and handheld works brilliantly. The overhead gives you a proper shower experience, while the handheld helps with filling the bath, washing kids, and cleaning the bath itself. Look for shower sets that include both with a diverter valve to switch between them. Best of both worlds.
Bathroom Renovation Ideas
- Types of Showers and How to Choose the Right One for Your Space
- Best Baths for Small Bathrooms and How to Save Space
- Corner Bathtub Buying Guide: What to Know Before You Choose
- Layout Considerations for a Bathroom Reno
- The Ultimate Guide to Choosing the Perfect Shower Mixer for Your Bathroom
- 5 Small Bathroom Ideas With Shower Layouts That Save Space